Your cart is currently empty!
I’ve raised a Burr, What’s Next? Knife Sharpening Step 2: Honing
Raising a burr is paramount when sharpening a knife. If you’re looking to learn more about that critical step, head back to last week’s video or read our article.
If you’ve mastered the burr, you can sharpen anything.
Using your favorite sharpener, move from coarse grit to medium, or fine grit. The task ahead is to remove the burr and leave a refined and sharp edge. Repeat a similar process to initial sharpening by drawing your knife across the abrasive, and this time, alternate strokes, making one pass on the left side of the bevel, and one on the right. The fine abrasives remove material (the burr) slowly, and it is important to alternate strokes to maintain symmetry.
Using a medium grit such as a 600 diamond, make 5 strokes per to help quickly remove the burr, then switch to the fine abrasive, like a ceramic rod or plate.
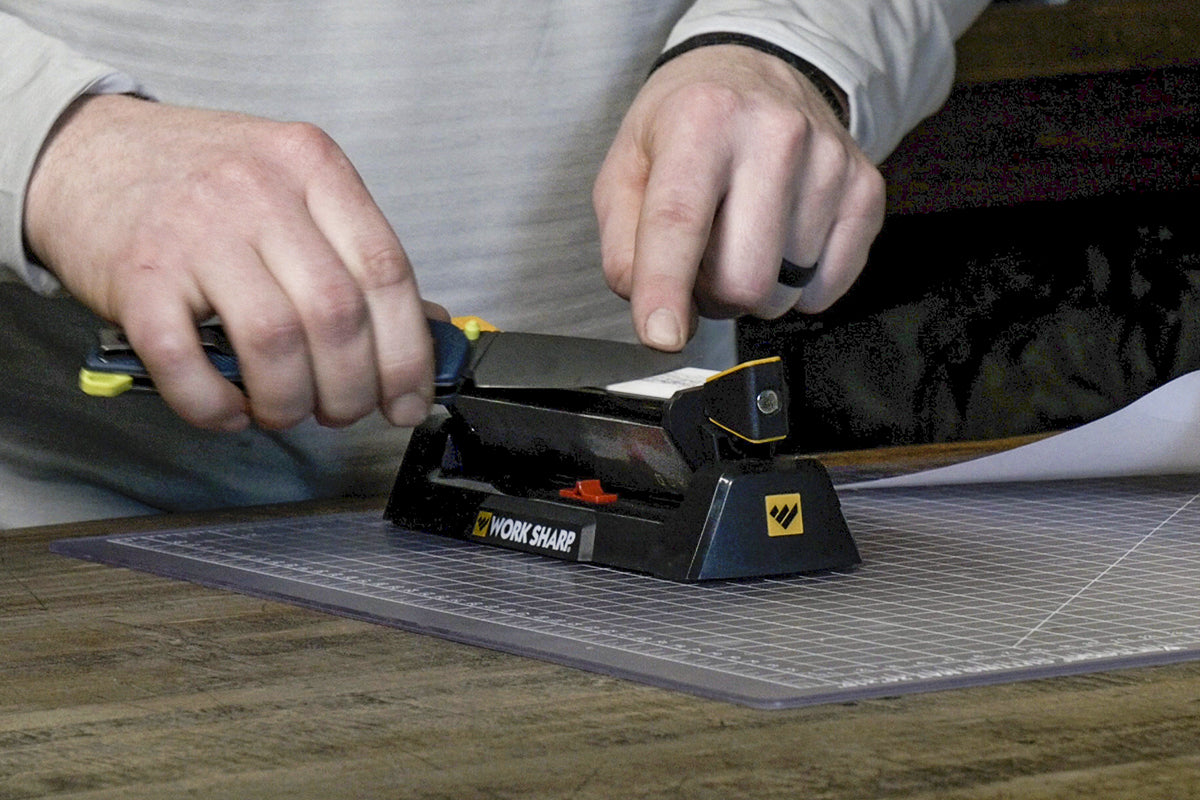
Using a ceramic or fine abrasive continue alternating strokes using lighter pressure with each stroke. The amount of pressure applied increases the cutting rate of the abrasive, using lighter pressure helps to refine the edge even further. Continue until you have reached 10 strokes per side and check to see if the burr is gone. Do this by pushing your finger off the edge of the bevel, making a motion from spine to bevel, if you cannot feel a burr, jump ahead to a test cut. If you still feel a small burr, repeat another 10 strokes per side. Take special care to practice consistency through the belly and at the tip of the knife, these areas can be challenging when sharpening by hand.
Once you have removed the burr the knife will have a sharp, working edge. Time to test your work!
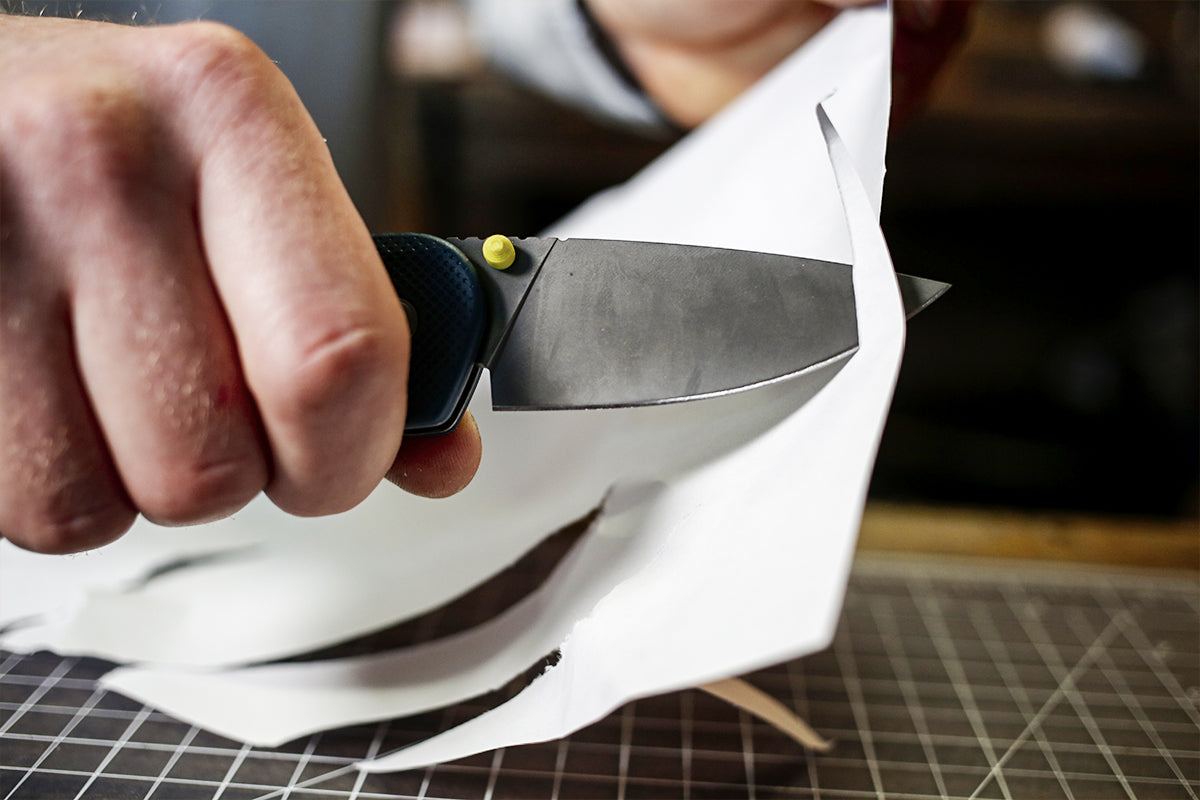
Grab a magazine and cut out a page. Hold the page securely in your non-dominant hand. At a 45-degree angle (down and away from you), draw your knife through the paper and perform a cut test. Does it slice smooth? If not, give it a few more strokes on the ceramic, check the thumbnail test, and try it again.
If this working edge is not sharp enough for you, take it one step further with stropping… we’ll save that for neXt week.
This is the process of honing a knife. Raising a burr is the first step when reviving a hopelessly dull blade, however, honing is a critical step to make use of that blade and is a much more frequent procedure. The process of honing is also used to correct and straighten a used edge, that is not yet dull. When a knife is used the very tip of the bevel, or the cutting edge, is pushed slightly to one side or the other. Eventually this can cause the tip of the bevel to break, revealing a dull section on the blade. Honing a blade on a ceramic rod, or plate, or other fine abrasive, can help re-align the bevel and increase the life of the sharp edge. Honing is a daily function for working blades and prevents frequent sharpening.
What tools do you use to hone your knives? Let us know in the comments!
4 responses to “I’ve raised a Burr, What’s Next? Knife Sharpening Step 2: Honing”
Thanks for the tips
Your videos are lame. Why no close ups
I have the Ken Onion machine , I would like to know what determines 20 degree to a 25 degree setting ??
Dear Gerard,
The lesser the degree the sharper the instrument..axes may just be using 25 degrees and a scapel would be 19 degrees. I use 20 degrees for my kitchen knives.