Dexter Ewing
The last installment of this blog, I covered the basics of sharpening. This is sort of a continuation of that except we’re going to cover the basics of setting up your workspace for sharpening. This is a very important step to do even before you begin sharpening. Your workspace is key to doing good sharpening. You have to set it up right and be as comfortable as you can be in this space so you can fully concentrate on the task at hand. There’s a lot more to setting up your workspace than choosing the ideal location. Hopefully, this insight I will provide will help you to create as comfortable a workspace as you can.
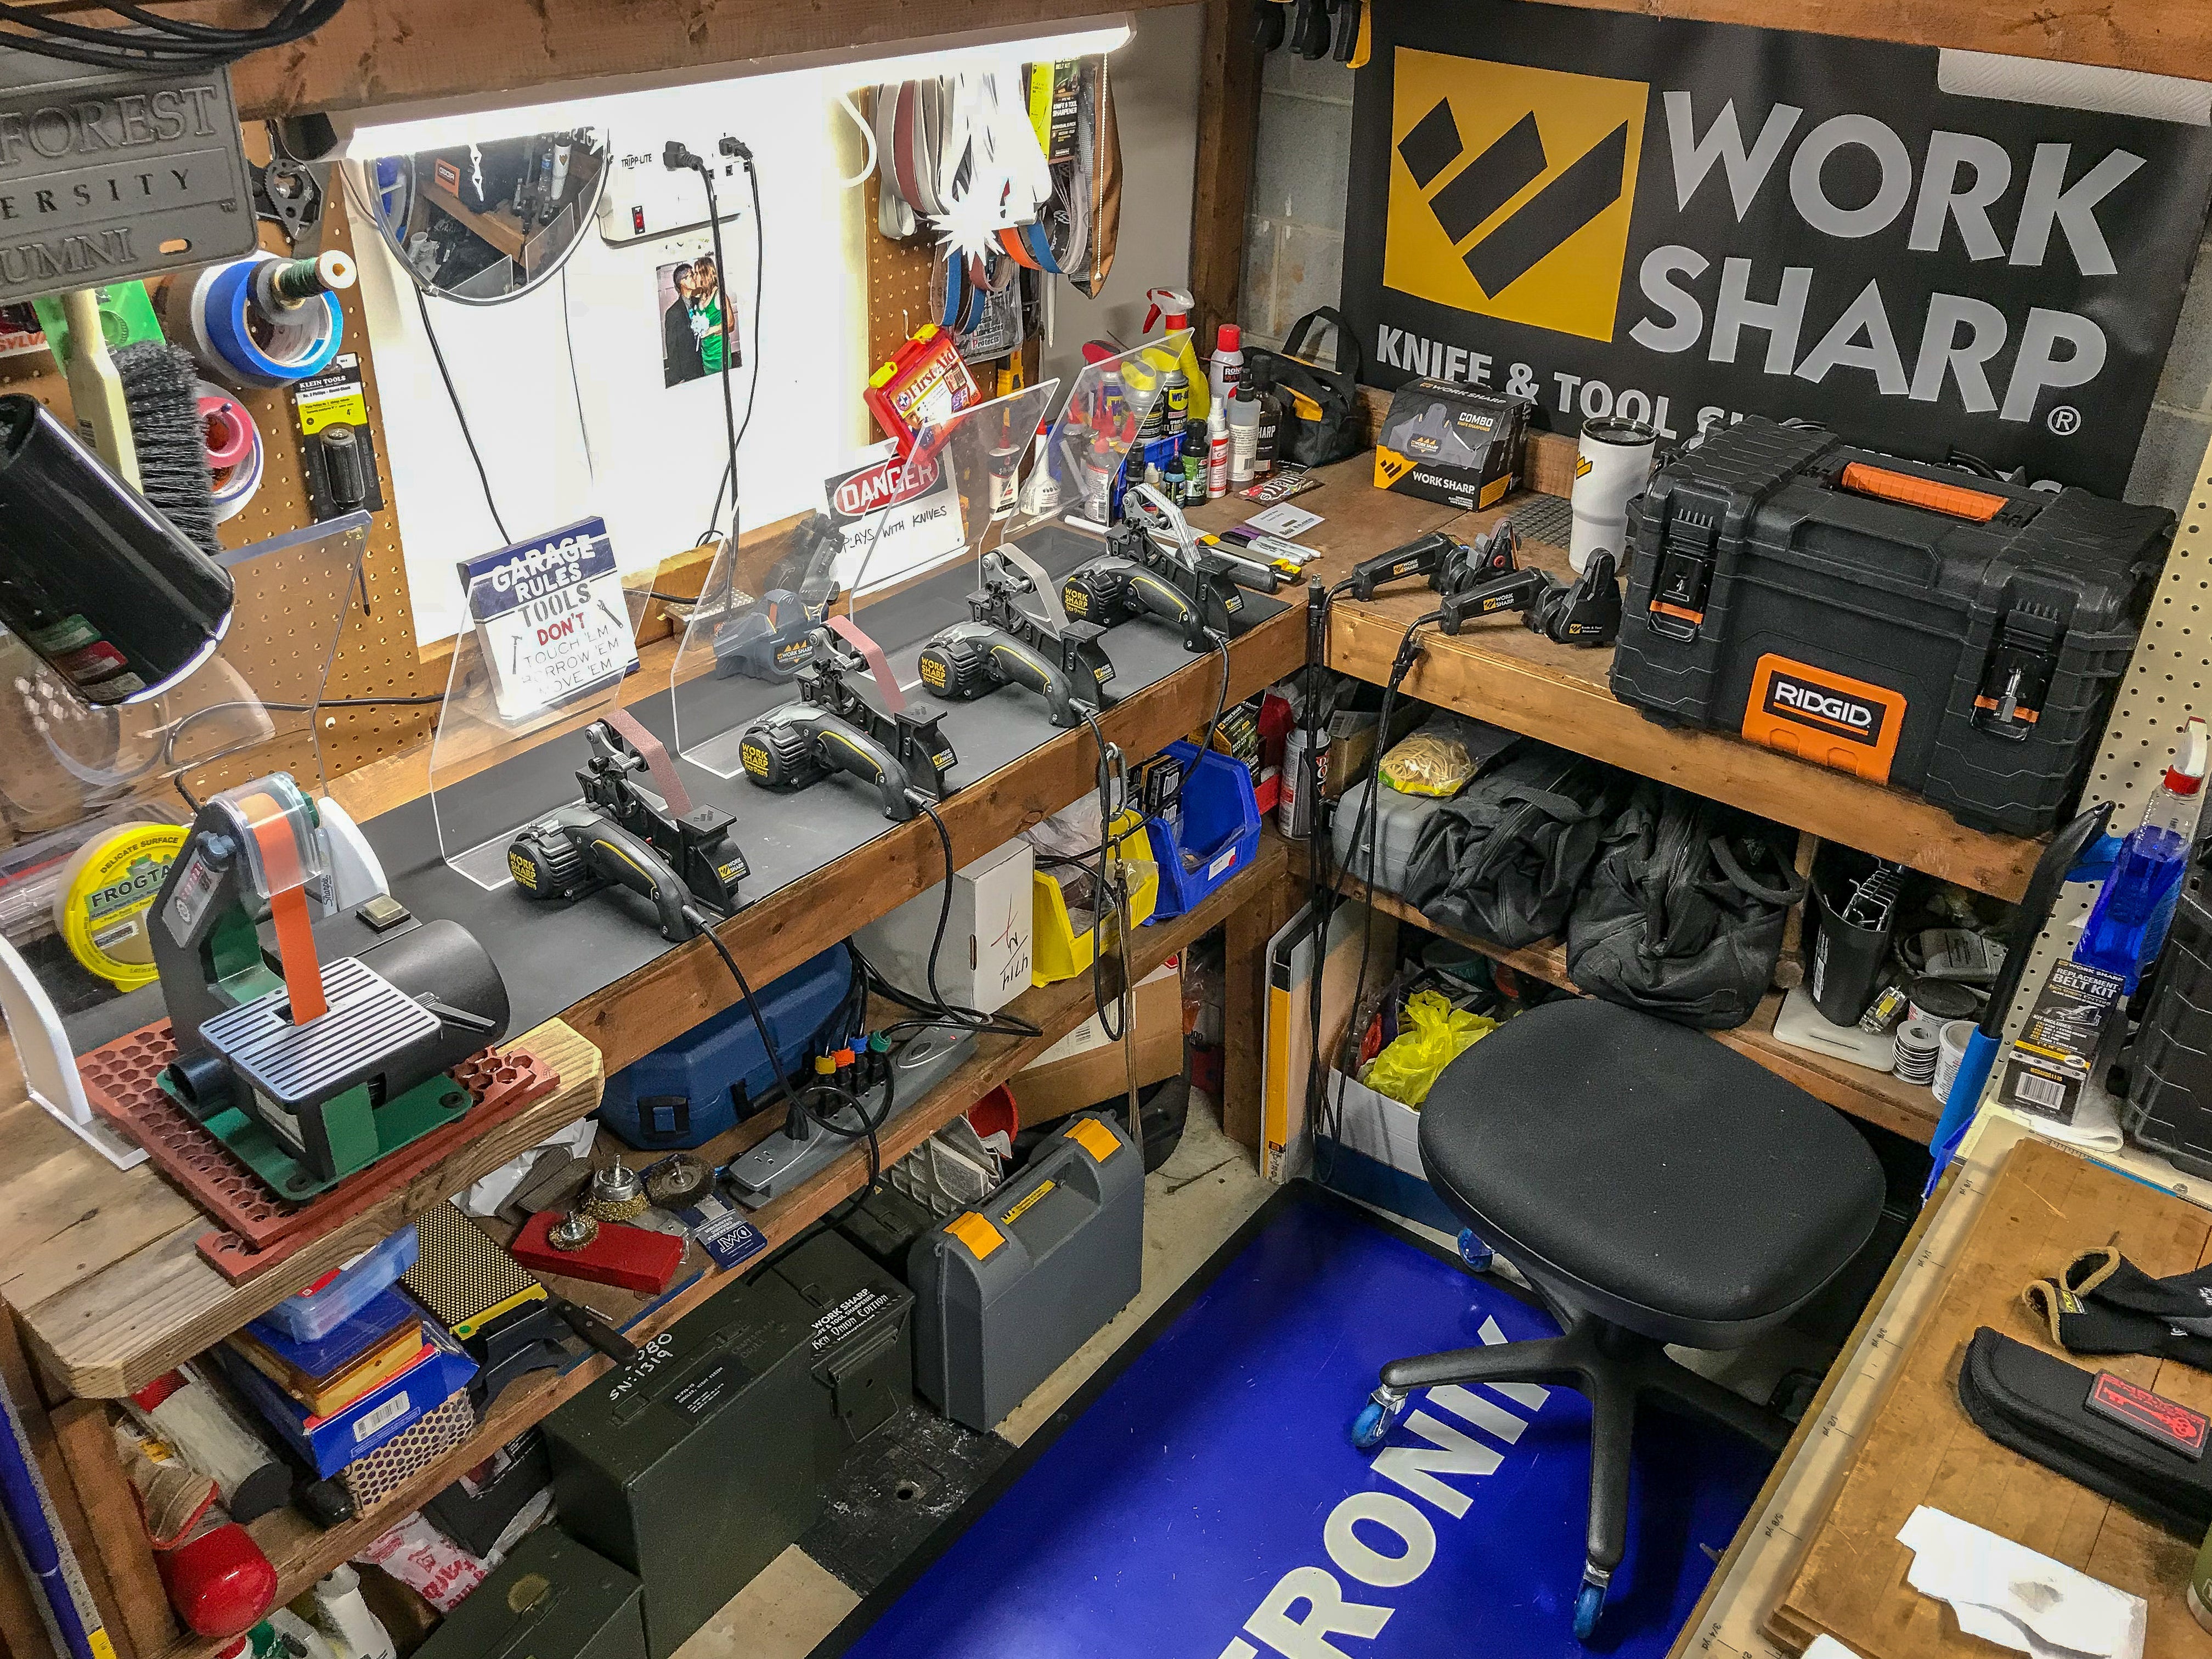
Just like real estate, the key is “location, location, location”. Ideally, it would be best if you have room to set up a dedicated space for sharpening such as a workbench in your garage or even in your home office. This would primarily depend on what equipment that you use for sharpening. For instance, I have a 1 x 30 belt sander and four Work Sharp WSKTS-KO Ken Onion Edition Sharpeners, each with the Blade Grinding Attachment outfitted on them. So obviously, there’s a lot of airborne debris generated from sharpening and in addition to these, I also use a Dewalt 4 ½” grinder to sharpen mower blades as well. So, using this equipment is conducive to me setting up my workspace in my garage to keep the airborne particles from settling in my house. IF you are not using anything powered at all, then you can get by with sharpening inside your residence. Regardless, be sure you have ample space for you to work in as well as storage for your sharpeners.
Next, after you have your workspace location selected it is VERY important that you have an excellent source of lighting. Either with artificial lighting or a combination of natural and artificial. To be able to see your work clearly is VERY important to achieving great results with sharpening. Above my main workbench with the sharpening machines I have an LED shop light that is suspended. It throws out a crazy amount of light that allows me to see clearly what I am working on and the detail of it. I would highly suggest going the LED route because having any other light sources such as halogen or even incandescent bulbs only add to the heat you will feel. You will want to flood your work area with light so there won’t be any cast shadows that might impair your work. The good thing about LED bulbs is that you can also get them in the 5000K color temperature “daylight” grade, which is pure white light. These would be good for your work area as colors will appear naturally and make things easier on your eyes.


The choice to sit or stand? This is primarily what you feel comfortable with. I actually prefer standing because my workbench height is such that it accommodates standing. That and I can also have a good field of vision of my work. Also, because I use multiple WSKTS-KO machines for various grits of belts, I can easily “walk” down the line, progressing to the next machine on my way to a razor sharp blade. To do this while sitting down is a bit more difficult. If you choose to stand I highly recommend that you invest in a really good anti-fatigue mat for the floor. You can find these at hardware stores/home centers, and even industrial supply vendors. You would be surprised at how much difference a cushioned anti-fatigue mat would make! They might be a bit costly depending on the size but let me tell you, your feet and legs will thank you for that! But if you don’t have this much sharpening equipment then sitting down is an option. I’d recommend investing in a comfortable, bench height task chair with wheels. The kind with the metal foot rest ring just above the casters. These chairs have pneumatic height adjustments, armrests, and may have multiple adjustments to tailor the fit of the chair to your personal liking. You CAN get by with a regular padded stool, but in my experience the padded stools get uncomfortable after a while and they do not offer any back support or armrests. If you’re using a regular table, then a standard task chair would suit you fine. Again, the key here is comfort. The more comfortable you are while in your workspace, the better the sharpening job and the better your concentration and focus will be.
Sharpening knives is inherently a semi-dangerous activity. Getting cut accidentally will happen from time to time, it’s just the nature of this task especially if you do the volume of sharpening that I do at times. Therefore it is crucial to have a First Aid kit close by, within easy reach, of your work area. If you go to the drug store and buy the First Aid kit they have there that comes in a plastic storage box, it will actually have more than you need but that’s OK. You never know what you may need at times! Along with a First Aid kit, if you do a lot of sharpening on the modern tactical folders like I do, you know these knives have the small Torx or hex head screws used for the assembly screws, pivot screws, or pocket clip screws. While you’re working on your knives you might discover that the pocket clip maybe loose or the blade tension has loosened. Having a small toolbox at the minimum is also beneficial. I’d stock it with the appropriate sizes of Torx drivers, hex drivers, and some basic tools like screwdrivers, needlenose pliers, and the like. Nothing is more aggravating than needing a tool and there not having it or having to go hunt around your place for it! Since I do my sharpening in my garage, I have all my toolboxes there already so I am more than equipped to work on tactical folders. If you don’t have any of these tools, Most if not all can be acquired in a cost conscious fashion by visiting a home enter or a place like Harbor Freight Tools.
And lest we not forget creature comforts. Since I’m in the garage year round doing sharpening, I have an infrared space heater for warmth in the winter and a powerful fan for cooling during the summertime. And if you are like me, I love having music playing while I work. So, have some sort of device set up to allow you to play music or listen to the radio, satellite radio, MP3’s…whatever your choice of music and whatever format. Since working with motorized sharpening equipment heats up a blade faster than manual sharpening does, I would also opt to keep on hand a sizeable glass or plastic jar filled with tap water to dunk the blade in to cool it down. Also, a spray bottle filled with water will work too, if you can allow the water to drip onto the floor. Depending on the size of the blade I am working on, sometimes, a 5 gallon bucket filled with water is also necessary.
So there you have it. This is a primer on setting up your sharpening workspace and all these tips I have passed along I have personally implemented in my work area. Feel free to add your own to this as well, whatever works for you and whatever you feel comfortable with. Just remember, the better equipped your workspace is, the more comfortable you will feel and that will translate into the best sharpening job you will do.
Text by Dexter Ewing, Work Sharp Pro Staff
Photos by Marty Stanfield, Marty Stanfield Photography


